
Recherches populaires
- Clavier
- Clavier magnétique
- MADE68 ultra
- Clavier à profil bas
Go to melgeek.com/download → Select your OS → Download and install.

The FN layers correspond to different operating systems:
If you want to set up F1–F12 as standard function keys on macOS:
Now, pressing FN + F1–F12 will work as standard function keys instead of media controls.
The O2 supports control of both backlight and side ambient lights.
We recommend using shortcut keys for lighting adjustments without needing the driver:
Backlight/Switch LEDs: FN + Z/X/C/V/B
Side Ambient Lights: FN + Q/W/E/R
Under the Advanced Keys section, you can assign custom functions to different FN key combinations.
Using the Macro or Advanced Key features, you can bind a key (e.g., a side key or unused right Option key) to simulate pressing Ctrl + Cmd + Space, which opens the emoji panel on macOS.
The O2 supports three keyboard modes:
Under Settings, you can check whether Online Upgrade or Firmware Update is needed.
You can restore the keyboard to factory settings by pressing Fn + Backspace, or through Hive → Setting → Restore Factory Setting.
To access MelGeek's self-developed web driver:
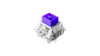
MelGeek magnetic switch keyboards support hot-swapping.
The MADE series is compatible with magnetic switches from TTC, Gateron, Kailh, and others.
Steps:

Due to the high sensitivity of magnetic switches, we recommend calibrating the keys manually in the following cases:
Path: Rapid Trigger → Calibrate → Start → Long press the keys until they turn green → Save Calibration Data
If a key cannot turn green during calibration:
① Online Update
Go to: Device settings → Online Update → Check for Updates → Wait for the update to complete
② Manual Update

Customize actuation point, bottom dead zone, rapid trigger, and more to tailor your keyboard for peak gaming performance.
Path: Rapid Trigger → Performance → Display parm
Select a key first, then adjust the corresponding settings.
Actuation Point: How far do you need to press a key for it to register. You can set it anywhere, not just at the bottom like normal mechanical switches.
Example: When the actuation point is set to 1mm, the key is triggered after being pressed 1mm down, without needing to press it all the way.
Bottom Dead Zone: A small area near the bottom where tiny movements won't accidentally press or release the key.
Example: If you set the bottom deadzone to 0.05mm, small movements of 0.01–0.05mm at the key's bottom won't cause it to register or release.
Rapid Trigger (RT): Makes keys respond faster by quickly triggering and resetting as you press or release, helping you react quicker in games.
Example: If the actuation point is set to 0.1mm and the sensitivity to 0.05mm, the key will register or release when it is pressed beyond a 0.05mm range after reaching 0.1mm.
In Advanced Settings, you'll find two special gaming options:
Once the key is triggered for the first time, it enters a full rapid-trigger mode. When not in full rapid-trigger mode, the RT function only works after the key is pressed beyond the actuation point.
Separate press and release sensitivity lets you set different actuation and release points, helping with gaming needs and preventing accidental double presses. (If using non-standard keycaps, try setting [Dynamic Reset Travel] to 0.2+.)
Path: Rapid Trigger → Advanced Settings
Import DRG pro team player settings instantly.
Path: Rapid Trigger → Pro Player Profile
The left side Profiles are different settings presets. MelGeek supports 4 profiles that you can rename, import, and export easily.
Keep separate settings for work, CS, Valorant, etc.
Path: Profiles → right-click → Rename / Import / Export
Settings save automatically.
Switch profiles in the driver by clicking, or use shortcuts:
Path: Lighting → Backlight → choose Static or Dynamic
You can also use shortcuts without the driver:
Backlight / Switch Light: FN + Z/X/C/V/B
Path: Lighting → Box light → choose your favorite effect
You can also use shortcuts without the driver:
Lightbox Shortcut: FN + Q/W/E/R
In Key Mapping, you can change any key's function.
MelGeek offers full keyboard presets for both Windows and Mac.
Mouse buttons, lighting shortcuts, and special keys can also be remapped, making your keyboard perfect for gaming.
Path: Key Mapping → Basic → select the key to remap
Path: Key Mapping → Super key → choose from various functions.
Right-click a key to open super key options, apply different functions, or restore the key to its original value.
To prevent accidental Win key presses during gaming (which open the Start menu), enable Macro Key → All → Win Lock in the driver. This locks the Win key to avoid interruptions.
The MADE series firmware presets FN + WIN as Win Lock. If cleared, you can reset it.
DKS means one key can perform 1 to 4 different actions depending on the depth of the key press.
How to Bind & Test:
Path: [Super Key] > [add DKS] > Set parameters > Return to [Home] > [Tool] > [Keystroke analyze]
Example: Set D as Dynamic Key and bind A as an action. When D is released, A is automatically triggered. Recommend using [Single Key Reverse Tap] for better results.
The Replace Key feature allows one key to perform multiple key actions simultaneously.
How to Bind & Test:
Path: [Super Key] > [Advanced Key] > [Add Advanced Key] > [Replace Key]
Return to [Home] > [Tool] > [Keystroke analyze]
Example: In LoL, to trigger Flash (D) and Ult (R) at once: Set [Replace Key], select R then D, confirm to generate Super Key A1. Assign A1 to D key for dual-action effect. (Demo only, not recommended for actual gameplay.)
Allows one key to have two effects: single press = one action, hold = another.
How to Bind & Test:
Path: [Super Key] > [Advanced Key] > [Add Advanced Key] > [Mod tap]
Return to [Home] > [Tool] > [Keystroke analyze]
Example: On MADE68, assign number key 5 = short press for "5", long press for F5 (refresh). Or set a key to [Hold] = Delete, [Tap] = ESC.
You can adjust the delay to determine how long a key must be held to trigger the second action.
This feature toggles continuous key triggering. One tap = hold key; tap again = stop.
How to Bind & Test:
Path: [Super Key] > [Advanced Key] > [Add Advanced Key] > [Toggle Key]
Return to [Home] > [Tool] > [Keystroke analyze]
Example: In racing games, tap once to keep W key pressed (accelerate). Tap again to stop. (Demo only, not recommended for real gameplay.)
The Macro feature lets you assign a sequence of keyboard or mouse actions to one key. Great for executing combos efficiently.
How to Bind & Test:
Path: [Super Key] > [Macro] > Record actions > Return to [Home] > [Tool] > [Keystroke analyze]
Example: In Naraka: Bladepoint, record combo "C + A + B + B" using [Start Recording], perform actions, then click [Stop Recording].
In FPS games, SOCD (Simultaneous Opposite Cardinal Direction) can be implemented using [Smart Tap]:
Set two keys to be mutually exclusive. Only the latter input will be recognized (e.g., press A + D = only D works).
How to Bind & Test:
Path: [Super Key] > [SOCD] > Automatically effective > [Home] > [Tool] > [Keystroke analyze]
Example: In CS, enables clean strafing and zero-delay movement switching.
In CS, this allows fast stopping by binding key release to trigger the opposite direction key. Unlike SOCD, this supports any two keys.
How to Bind & Test:
Path: [Super Key] > [DRT] > Set Key A and Key B > Confirm > Return to [Home] > [Tool] > [Keystroke analyze]
Example: Set A triggers D on release; D triggers A on release. Great for eliminating movement lag and improving aim stability.
In [Settings], it's recommended to enable all three functions:
You can toggle between Dark Mode and Light Mode in the driver interface.
How to Set:
Go to [Settings] > Look for [UI Theme] or [Color Scheme] > Choose either Light or Dark based on your preference.
This allows a more comfortable viewing experience in different lighting environments.
|
Comparison |
| Couleur |
| Nombre de touches |
| Matériau du boîtier |
| Matériau des touches |
| Taux d'interrogation |
| Interrupteur |
| Rétroéclairage |
| Précision RT |
| Zone morte |
| Latence |
| Prix |