


If you use a magnetic keyboard, you’re already familiar with its benefits: fast trigger sensitivity, adjustable actuation points, and exceptional durability. However, like traditional mechanical keyboards, magnetic ones can accumulate dust, hair, and food crumbs that may affect the precise 0.1mm responsiveness you depend on.
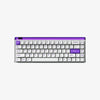
The cleaning process for magnetic keyboards mirrors that of mechanical keyboards, yet requires special attention to Hall Effect sensors and recalibration procedures. This guide shows how to clean a magnetic switch keyboard, including key removal, case cleaning, and recalibration, with the MelGeek MADE68 Pro as an example.
Before You Start: Understand the Tech
Unlike traditional mechanical switches that rely on physical metal contacts, magnetic keyboards use Hall Effect technology is based on magnetic principles, in which an electric current change is sensed using a magnetic field.
Why does this matter for cleaning?
- Sensors are sensitive: Dust blocking a sensor can theoretically mess with actuation accuracy.
- Calibration is key: When you remove and replace magnetic switches, you may need to recalibrate the board to ensure the "zero point" hasn't shifted.
- Switch Compatibility: Never force a standard mechanical switch into a magnetic socket, or vice versa.
Tools You'll Need
You don’t need a specialized workshop, but having the right tools prevents damage to the delicate stems and keycap sidewalls.

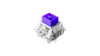
- A Wire Keycap/Switch Puller: We’ll be using a high-quality tool like the MelGeek Keycap and Switch Puller that comes with the MADE68 Pro. Unlike plastic ring pullers, wire pullers won’t scratch your caps, and a combo tool is essential if you plan to remove the switches themselves.
- Compressed Air: For blowing out debris from the plate.
- Microfiber Cloth: To wipe down surfaces without leaving lint.
- Soft Bristle Brush: The soft bristle brush enables users to reach difficult areas that exist between switches.
Step-by-Step: Deep Cleaning Your Magnetic Keyboard
Step 1: Unplug and Snap a Photo
Safety first. Unplug the keyboard from your PC. Since magnetic keyboards often have onboard memory for rapid trigger settings, unplugging ensures you don't accidentally trigger a macro or reset a profile while scrubbing.
Take a clear photo of your keyboard layout. Magnetic boards often have unique function layers or custom keycaps, and you will thank yourself later when trying to remember where the specific symbols go.
Step 2: Remove Keycaps with Precision
Using your wire puller, carefully position the wires over the keycap and twist them slightly so they catch under the corners.
You have to implement additional safety measures to handle Spacebar and Shift and Enter keys because they operate with stabilizers. Gently lift first on the left side, then on the right, until the stem detaches from the stabilizer mounts.
Step 3: Removing Magnetic Switches (Optional but Recommended)
If your keyboard supports hot-swapping (which most magnetic keyboards do), removing the switches enables a more thorough cleaning.
- Use the switch-puller end of your tool.
- Clamp the top and bottom of the switch housing (where the tabs are).
- Pull vertically.
- Inspect the Sensor: Once the switch is out, you will see the bare PCB or the Hall sensor. Ensure no hair or dust is blocking this area.
Note: Keep your magnetic switches separate from any standard mechanical switches you might have lying around. They look similar but function differently.
Step 4: The Clean Up
Your magnetic keyboard requires regular cleaning to perform at its optimum while remaining durable for long-term use. A soft brush together with compressed air allows you to remove dust particles and tiny debris that get stuck between keyboard keys. The keycaps should be removed with care to perform a thorough cleaning which needs gentle washing of surfaces through mild detergent mixed with water.
Step 5: Reassembly and Calibration
This is the step unique to magnetic keyboards.
- Re-seat the Switches: Press them firmly into place. Ensure the movement is smooth.
- Replace the Keycaps: Refer to your photo and press the caps back onto the stems.
- Plug in and Calibrate:
Once connected, open your keyboard’s software (e.g., MelGeek Hive).
Look for a "Calibrate" or "Recalibrate Travel" option.
Since you removed and re-seated switches, the resting position of the magnet might have shifted by a microscopic fraction. Calibration tells the software, "This is the new zero point," ensuring your Rapid Trigger settings remain accurate.

Final Thoughts
It does not take much effort to know how to take out keyboard keys in a safe manner. The MelGeek Keycap and Switch Puller tool along with proper lighting and patient work will restore your keyboard to its original condition without causing any harm to its components. Through brief strategic planning your board will operate flawlessly while extending its operational lifespan.
FAQs About Removing Keyboard Keys
Can I take out laptop keys with a puller?
It depends on the model. The scissor switches in the laptop keys are prone to breaking when pulled upright. Some can be removed, while others cannot. The first tip is to check the laptop's manual.
How often should I clean under my keys?
Once every three or four months is sufficient for most. Gamers or individuals who have meals at their desks may want to clean more frequently.
Are all keyboard keys removable?
The keys of a mechanical keyboard can be removed. Membrane keys are not as long-lasting, and most of them can be removed. The keys of laptops are the most delicate and should be handled with more attention.
Can I remove keys from all types of keyboards?
Most types can be removed using keys, although the method varies with the board. The easiest are mechanical switches. Low-profile keyboards require a light touch. Laptop keys are diverse; therefore, be cautious.