


Ton clavier mécanique est un concentré de performances et un plaisir à utiliser, mais comme tout outil apprécié, il nécessite un entretien régulier. La poussière, les miettes et la saleté peuvent s'accumuler, affectant à la fois son toucher et sa longévité. Un nettoyage en profondeur peut restaurer votre clavierLes performances de votre appareil vous offrent une sensation de propreté et de confort. Suivez ce guide complet pour un travail impeccable.
Les outils dont vous aurez besoin
Avant de commencer, rassemblez vos outils de nettoyage et de démontage. Vous aurez besoin d'un extracteur de touches, d'un petit tournevis, d'une brosse, de cotons-tiges, d'une solution nettoyante (du liquide vaisselle convient) , d'une bassine, d'un chiffon en microfibre et d'un petit récipient pour les vis.
Le processus de nettoyage
Étape 1 : Documentez votre disposition et débranchez l'alimentation
Avant de retirer une seule touche, prenez une photo rapide de votre clavier. Avec autant de clés, il est facile de se perdre lors du remontage. Cette étape simple vous évitera bien des frustrations.
Ensuite, débranchez toutes les sources d'alimentation. Débranchez le câble de données et, s'il s'agit d'un appareil sans fil, clavier, éteignez-le et retirez les piles. Ceci est crucial pour votre sécurité et pour éviter tout dommage aux composants électroniques.
Étape 2 : retirer les touches
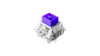
À l'aide de votre extracteur de touches, retirez soigneusement tous les touchesSoyez délicat, surtout avec les touches les plus grandes comme la barre d'espace, qui sont souvent dotées de stabilisateurs. Une pression trop forte peut endommager les stabilisateurs et affecter la sensation de la touche.

Étape 3 : Faire tremper et nettoyer les touches
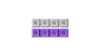
Placez tous vos éléments supprimés touches dans une bassine d'eau tiède additionnée d'un peu de liquide vaisselle. Veillez à ce que l'eau ne soit pas trop chaude, car cela pourrait déformer le plastique. Laissez-les tremper pendant que vous travaillez sur le clavier corps.
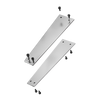
Étape 4 : Démonter le boîtier du clavier
Cette étape peut varier en fonction de votre clavier Modèle. De nombreux claviers, comme le Dareu série A, utilisent un cadre extérieur magnétique. Pour ce type de clavier, utilisez un tournevis de précision ou une pince à épiler pour retirer délicatement le cadre. Soyez délicat pour ne pas endommager les clips en plastique. Une fois retiré, essuyez le cadre extérieur avec un chiffon en microfibre imbibé d'alcool.
Pour les plus traditionnels claviersVous devrez dévisser les boîtiers supérieur et inférieur. Repérez toutes les vis, dévissez-les soigneusement et placez-les dans votre petit récipient pour ne pas les perdre.
Étape 5 : Nettoyer le corps principal et les commutateurs
Passons maintenant à l'événement principal. Si votre clavier est remplaçable à chaud commutateursVous pouvez les retirer pour un nettoyage en profondeur. Sinon, pas d'inquiétude : utilisez simplement une brosse pour éliminer la poussière et les débris des interstices. commutateursPour les saletés plus tenaces, humidifiez un coton-tige avec un peu d'alcool et essuyez délicatement la surface.
Une fois la surface propre, vous pouvez utiliser un sèche-cheveux pour vous assurer que tout est complètement sec avant de continuer.
Étape 6 : Séchez les touches et réassemblez-les
Après le trempage, rincez votre touches Rincez-les abondamment à l'eau claire pour éliminer tout résidu de savon. Sortez-les un par un et séchez-les soigneusement avec une serviette propre. Si vous avez le temps, laissez-les sécher à l'air libre pendant une heure dans un endroit bien aéré pour éliminer toute trace d'humidité.
Une fois que tout est sec, remontez le clavier en remontant le boîtier et en le vissant. Puis, en vous aidant de la photo prise précédemment, réinstallez tous les touches.

Dernières pensées
Même si votre clavier Même si votre ordinateur semble propre, la poussière et les débris peuvent s'accumuler dans des endroits invisibles, ce qui affecte ses performances au fil du temps. Un nettoyage régulier est le meilleur moyen de préserver sa durée de vie et de lui donner un aspect agréable. Maintenant que vous savez comment faire, votre clavier je te remercierai pour le TLC !