


Hall effect keyboards give you more than fast response and adjustable actuation. They also let you build a setup that feels and looks like your own. This guide walks through themes, side panels, keycaps, lighting, and simple upgrades to help you create a keyboard that fits your style, space, and daily use.
Why build a custom Hall effect keyboard
Building a custom Hall effect keyboard is not just about getting better performance. It is also about creating a keyboard that fits the way you work, play, and express yourself.
A keyboard is one of the tools you use most every day. So, beyond speed and responsiveness, comfort, style, and personalization matter too. A custom setup gives you more control over both function and appearance, which makes your keyboard feel more personal and enjoyable to use.
Start with your keyboard theme
Before buying parts, it helps to decide how you want your keyboard to look and feel. A clear theme makes the whole process easier because it helps you make more focused choices instead of buying random parts that do not work well together. It can also save you time and money by reducing unnecessary purchases.
Choose the Look and Style You Want
Begin by determining the general style of your keyboard. Are you more of a minimalist, clean person or a bold, eye-catching type?
Some opt for soft pastel structures, while others choose dark, professional colors. It is also possible to talk about themes such as retro, gaming, or futuristic setups.
The style you want should align with how you use your desk daily and how you envision it.
Choose a color direction before buying parts
Color planning is crucial. Choose two or three colors to use throughout your setup. It is easier to select the keycaps, side panels, and lights subsequently. You may find yourself in a situation where your set is very much out of place due to a lack of color direction.
You may use motivation on your desk objects, PC arrangement or even the room colors to make your decision. It can be assisted with the mood boards or with a mere reference.
Build a Theme That Fits Your Space and Personality
You must make your keyboard a native of your workplace. Consider your desk, your light, and the surroundings.
In a bare, soothing environment, it is better to use subdued tones and minimalist designs. If you prefer vivid combinations, you may use more intense colors and stronger light effects.
The most important thing is to create something that reflects your personality. A themed keyboard is not only prettier but also more pleasant and motivating to use daily.
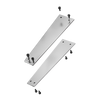
Customize the side panels first
Side panels are one of the easiest ways to personalize a keyboard. They sit along the edges, but they can still make a big difference in the overall look of your setup. They are a great starting point because they create a strong visual base before you move on to keycaps and lighting.
How to choose side panel colors and materials
First, choose a material based on the style you want. Other alternatives, such as aluminum, offer a clean, premium finish, whereas the acrylic panels provide a colorful, vibrant appearance.
The use of color is also important. You can either match the panel to your keyboard case for a smooth design or choose a different panel shade to make the edges more prominent.
Matching side panels with the case and desk setup
Your side panels must match your keyboard case and your desk to create a harmonious arrangement. This is where one can distinguish such products as the Made68 Series Side Panel.
These panels fit the Made68 series perfectly and are thus easy to install. They are available in various finishes, such as anodized aluminum and transparent acrylic, enabling you to align themes ranging from minimal to professional with colors and expressions.
It is possible to match the panel color with the desk accessories, the mouse, or the lighting to have a uniform appearance. This means you can change the panels at any time, since they are interchangeable, so you do not need to replace the entire keyboard.

Simple side panel ideas for beginners
When you are a beginner, start with something simple. Select a primary and an accent.
A minimal appearance is obtained with a clean black or silver panel. Or with a light pastel panel, there has to be a pop. With greater confidence, you are able to test yourself with bolder combinations. It is aimed at maintaining a lean, balanced design.
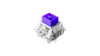
Choose keycaps that fit your style
Keycaps have a huge impact on both how your keyboard looks and how it feels to use. Since they are the part you touch most often, choosing the right set can improve comfort as well as appearance.
Pick a Keycap Material That Matches Your Feel
The most frequently used materials are ABS and PBT. The ABS keycaps are also lighter, smoother, and more comfortable to type on. They can typically be used in sets of colors or themes. PBT keycaps are stronger and slightly textured. They do not shine with time and are also more solid during typing. PBT generally works better in the long run compared to the others.
Choose a Profile That Feels Comfortable to Type On
The shape and the height of the keys are called the keycap profile. Some of the profiles are taller and curved, whereas others are shorter and flatter.
The common ones are OEM and Cherry profiles, which are comfortable for most users. The low-profile keycaps are more modern and faster, whereas the taller profiles are more traditional to type. The selection of the right profile will be based on typing style and comfort level.
Match Colors and Legends to Your Setup
After you have chosen the material and profile, design, keycaps are supposed to correspond to the theme of your keyboard and our general desk.
You may use clean, single-color sets or contrasting colors to create a bold appearance. The letters on keys may also be varied in form, ranging from simple, minimal legends to artistic and decorative ones. The perfect match of a keycap set completes your keyboard.
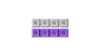
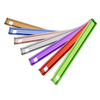
Use the light bar as a design feature.
The light bar not only serves as a light source, but is also a very important indicator of your keyboard. When applied properly, it will entirely change the appearance and the touch of your setup. It provides a sense of depth, glow, and personality without altering the underlying hardware.
Choose Colors That Fit Your Setup
Begin with the color palette, which should align with your theme. For minimal setup, light-colored, single-color lighting is the best.
If you want more vivid arrangements, you can play with strong RGB. To make your light bar, keycaps, or desk lighting look connected, it is a good idea to match them. Consistency matters. Avoid using too many colors at once.
Try Lighting Modes for Different Moods
The keyboards available today support various lighting options. It is possible to alternate between fixed colors, breathing effects or reactive lights. Use soft lighting for work or study environments. For gaming, select dynamic or reactive modes to create a more immersive setup.
Some keyboards also let you fine-tune both switch lighting and light box effects through their software. For example, on MelGeek keyboards, you can open Hive → Lighting → Box Light → choose your favorite effect to customize the lighting style you want. This makes it easy to adjust the keyboard’s look based on your activity, setup, or mood.
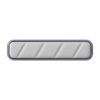
Balance Looks and Everyday Use
Since aesthetics is important, usability must take priority. In this case, the MADE68 Pro/Ultra Light Bar will be a good choice.
It also offers a variety of colors, including blue, purple, red, and green. Customization is easy to implement without being complex. The light bar is also replaceable, so you can change your appearance whenever you want without having to replace the keyboard. The Made68 light bar features a modular design that balances style and convenience. It’s easy to keep tidy while enjoying customizable lighting daily.

Add Stickers to Personalize Your Light Bar
Stickers are one of the easiest ways to make a keyboard feel more personal. They add character without changing the hardware, and they are easy to update later.
Choose Stickers That Match Your Style
Begin by choosing stickers for your general theme. For a simple setup, opt for small, clean designs. For colorful arrangements, you may use anime, abstract, or neon-colored stickers. There are also glow effects on some stickers, which may make them more visible and well-designed even in low-light conditions. You should be able to keep your color scheme the same to make it all appear connected.
Place Stickers Without Blocking the Light
When using a light bar, one should place it. Stickers are supposed to enhance the glow, not conceal it. Do not place the light bar in the center of the covering. Rather, stickers should be placed on the edges, or transparent designs can be used to allow light to pass through.
This allows the lighting effect to be visible and customized simultaneously. Equal positioning will give your keyboard a clean, purposeful look.
Keep the Look Clean and Easy to Update
Among the largest merits of stickers is flexibility. High-quality stickers are mostly easy to install and remove, leaving no traces. That is, you can alter your design at any time without damaging your keyboard. Do not cram too many lights on your bar. A small number of stickers can be positioned well and thus appear better than having many.
Have a simple, clean, and easy-to-refresh design that adapts to changing styles.
A Custom Keyboard Setup Starts Here
For a combination of performance and personality, the MelGeek MADE68 Ultra+ Jelly Pink would be a good place to start. It is designed in soft pink with a translucent finish, making your keyboard a visual focus.

It has magnetic switches that can be adjusted to actuate between 0.1mm and 4.0mm, providing fine control for typing and gaming. The crystal-clear keycaps also enhance RGB lighting, creating a unique glowing effect.
What makes it the best option for customization is its full compatibility with interchangeable side panels and accessories. This will enable you to switch styles without changing the keyboard.
It is not only about appearance but also about the overall design of a keyboard that suits your performance requirements and personal style.
Final thoughts
It is not only the speed you get with a Hall effect keyboard but also the control. The adjustable actuation and complete visual customization will let you tailor everything to your needs. You can easily establish a comfortable, intimate setup by starting with a clear theme and gradually building until you achieve it. The most appropriate thing is that it is flexible in terms of customization. You can continue upgrading your keyboard over time as your tastes and preferences change.
FAQ
Are Stickers Safe for the Light Box?
Yes, stickers are not that bad, provided that they are of good quality and removable. They are not to leave the surface or destroy it. Stickers should be thin and clear so that they do not block light.
Do I Need Special Keycaps for a Hall Effect Keyboard?
Not, the majority of hall effect keyboards can use standard mechanical keycaps. Some common profiles you can use are Cherry and OEM. All you have to do is make sure that it is compatible with your keyboard layout.
Is Building a Custom Hall Effect Keyboard Hard for Beginners?
No, it is user-friendly, provided one commences with simplicity. Basic changes, such as keycaps and panels, should be considered first. Later, as you learn more, you can do more customization.
How Do I Make My Keyboard Look Custom Without Overspending?
Begin with minor modifications, such as keycaps or lighting modifications. Select a distinctive color theme to avoid unnecessary purchases. Renovate parts gradually rather than purchasing them all at once.