
Popular searches
- Keyboard
- Magnetic keyboard
- MADE68 ultra
- Low profile keyboard
MelGeek Lab
MelGeek Lab is where we deconstruct the science of typing. Explore cutting-edge reviews and data-driven insights on analog magnetic-axis technology, mechanical keyboard performance, keycap profiles, and switch mechanics. Join our experimentation to build better.


|
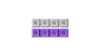
Comparison |
| Color |
| Number of Keys |
| Case Material |
| Keycaps Material |
| Polling Rate |
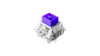
| Switch |
| Backlighting |
| RT Precision |
| Dead Zone |
| Latency |
| Price |